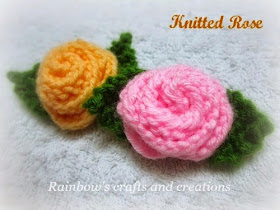
The pink carnation symbolizes a mother's undying love and it is always
given as a sign of gratitude. Thus, it is an ideal gift for mother's
day.
Mother's day 2015 is coming up, my siblings and I have been talking
about the celebration on this Sunday... What kind of gift should I give
to my mom? Could I try to knit a pink carnation instead of buying a
gift this year? Yes, this special day inspired me to be more creative
with knitting! I had finished my knitted pink carnation yesterday, would you try to knit one?
I believe this simple work would touch my mom's heart. She would treasure it forever and appreciate my heartfelt blessing...
materials:
1. pink and white colored yarn (100% acrylic, weight 40g )
2. a pair of circular needles size 4mm
3. a pair of double-pointed needles size 4mm
4. sewing needle & tapestry needle.
5. a piece of wire
knitting abbreviations :
K - knit
P - purl
K2tog - knit two together
P2tog - purl two together
Knitting pattern
Flower:
The flower pattern is worked in
flat but you can use
circular needles due to a large number of stitches is required.
cast on 248 stitches with white yarn
Row 1 : Join in pink color yarn and knit one row
Row 2 : Purl one row
Row 3 : K2tog for one row .......... (124 sts)
Row 4 : Purl one row
Row 5 : K2tog for one row ......... (62 sts)
Row 6 : Purl one row
Row 7 : K2tog for one row .......... (31 sts)
Row 8 : Purl one row
Row 9 : K1, *(K2tog, K1) repeat from * until the end of the row .......... (21 sts)
Row 10 : Purl one row
Row 11 : Knit one row
Row 12 : Purl one row
Bind off.
Leave a 6 inches end and cut yarn.
Calyx with sepals, stem and leaves:
Knit this part (Row 1 to Row 8) in
flat with a pair of
double-pointed needles, so you have to turn your work every time you have finished a row. This part will be the calyx with sepals.
Row 1 : Picot cast on (knitted cast on 4 stitches, bind off 2 stitches, transfer back one stitch onto the left needle) Repeat the steps until you have 5 picots and 10 stitches on your left needle.
Row 2 : K10
Row 3 : P1, P2tog, P7
Row 4 : K1, K2tog, K6
Row 5 : P1, P2tog, P5
Row 6 : K1, K2tog, K4
Row 7 : P1, P2tog, P3
Row 8 : K5
Don't turn your work, slide all the stitches to the other end of the double-pointed needle. Start using the
I-cord method at the following part (start from row 9 until the pattern is finished).
Row 9 - 14 : Knit 6 rows
Row 15 : cast on 6 stitches, bind off 6 stitches, transfer the single stitch on the right needle back onto the left needle and knit to the end of the row.
Row 16 - 18 : Knit 3 rows
Row 19 : Knit 4 stitches, cast on 6 stitches, bind off 6 stitches.
Row 20 - 24 : Knit 8 rows (or until your desired length of stem)
Bind off
Weave in the yarn end.
Assembly:
- Thread the tapestry needle with the yarn tail/end coming from the bind off edge. Then fold the bind off edge of the flower in half twice, and press to form a cylinderical base so the petals (ruffles) are gathered together. Sew to secure the base with the yarn tail.
- Cut a piece of wire the same length as the stem. Insert the wire into the stem from the upper opening (refer photo no.1) and tuck the the wire into the cylinderical base of the flower. Wrap the calyx around the base of the flower, sew the upper opening, then sew the sepals in place. You can sew this part with the yarn tail coming from the cast on edge, so make sure you leave enough yarn before you cast on the stitches.


