Showing posts with label crafts and patterns. Show all posts

Saturday, 25 April 2020

How to Make a Three Layers Cloth Mask cum Mask Cover


The key transmission route of Covid-19 is via droplets that fly out of our mouth when we speak, cough, or sneeze. So, everybody looks for masks since Covid-19 breakout and leads to a short supply in the market, especially the disposable 3-ply surgical masks. Therefore many people start looking for cloth masks or masks covers. Although we know that a cloth mask is not meant to replace the surgical face mask, it is better than none.
     I read an article a few days ago, it mentioned that the best cloth masks were constructed of two layers of heavyweight "quilters cotton" with a thicker and tighter weave and had a thread count of at least 180. It also stated, in other words, if the fabric allowed for a substantial amount of light to shine through, it was probably going to allow tiny viral particles through as well. 
     Since I have some quilters cotton in hand, I decide to make some cloth masks for my family members. I don't know the thread count of my cloth but there is not much light that can shine through. I think it should be all right. This is a 3 layers cloth mask cum mask cover, it features an opening at the top, you can insert a piece of liner, or unwoven fabric into the mask for added protection.
      A face mask is a precaution that we can take to help slow the spread of Covid-19 but it is not a substitute for physical distancing and other prevention methods.


Materials:
1. A piece of cotton fabric 21cm x 53cm
2. Two pieces of elastic string approximately 17cm
3. A piece of copper wire approximately 12cm


Make a 1.5cm double-fold hem at one of the short edges. So, fold your fabric towards the wrong side by approximately 1.5cm two times. Press the hem and pin it in place. Then, make a 0.5cm double-fold hem at the other short edge. You can either fold the fabric towards the wrong side or right side at this step. Press the hem in place and sew the hem. By referring to the picture on the right-hand side, place your fabric wrong side up, make a partial fold on the fabric by picking up the narrow hem and pull towards the large hem until you form a 31.5cm rectangle, and pin it in place.


Place the fabric right side up. Draw two sets of parallel lines with fabric chalk or water-soluble marking tool as shown in the picture. Start drawing the nine blue lines from left to right and nine pink lines from right to left. The short distance between two parallel lines is 1.4cm. It should be ten pink lines that I need to draw but it seems more difficult for me to explain the measurement here... (it should be one more parallel line at the 3cm space.) Don't worry, it won't be a problem when you make the last pleat. Now, pleat the fabric along sides. Pinch the fabric up so the line with "v" mark is at the top of the fold, fold towards the third line at the right-hand side and pin it. One pleat is finished. Repeat the steps to finish all the six pleats.


You should have six pleats in the same direction. Sew the pleats in place. You will find that the pleats on the partial folded part relatively thick.


Fold the fabric in half with the right sides together, sew the edges on either side where I mark with the blue lines. The part with the opening will be the top of the mask.


Sandwich the elastic string into the side opening and pin both ends at the bottom and the top of the mask respectively. Sew a 0.5cm seam to close the opening. Repeat the step to the other side opening.


Turn the mask right side out and topstitch a 0.5cm seam at both short edges. If you don't need a nose wire for your mask, a simple mask is done at this step. If you need a nose wire for more comfortable and secure, please go to the next step.


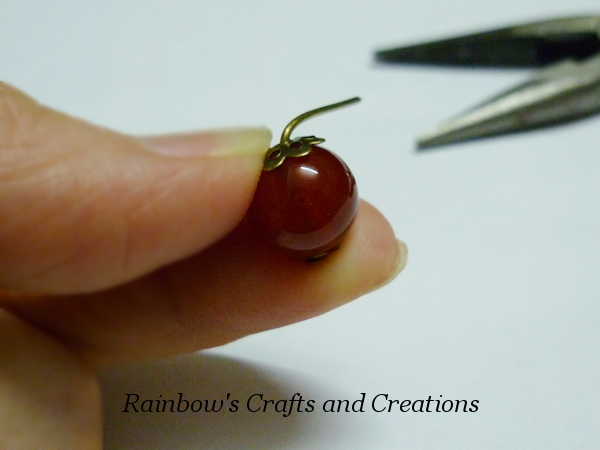
The picture on the left-hand side is a nose wire, remember to bend over the sharp ends before you insert it into the mask layers. After that, insert the wire to the very top of the front layer (the double layer) of the mask. Sew the 3 sides as shown in the picture to keep the wire in place. The room for the wire should be slightly bigger than your wire.


Finally, I hope all people around the world are keeping well during this extremely challenging time. Together we can win the war against Covid-19!!


Thursday, 6 June 2019

How to Sew a Lined Zipper Pouch

Hello, happy Thursday! Let's go through the steps below to make a lined zipper pouch. I am using cotton linen as the outer fabric and the plain lining fabric as the inner fabric in this project. Is it looks nice?


Materials:
1. Two pieces of  11" x 7" Outer fabric 
2. Two pieces of 11" x 7" Lining fabric
3. One piece of  2" x 9" Outer fabric
4. One piece of 2" x 3" Outer fabric
5. One piece of 11" zipper


These are the fabric pieces and zipper that we will need to sew a zipper fabric pouch. The 11" x 7" pieces are including 1/2 inch seam allowance at each edge.


The first step is to cover the tail of the zipper by using the 2" x 3" outer fabric piece. Fold it in half crosswise and press to create a crease. Open up the fabric with the right side facing up, fold the two short sides to the center crease one by one and fold again the center crease to create a cover. Tuck the tail of the zipper inside and topstitching the cover in place. Then, trim the excess fabric on the raw edges of the cover.


The second step, place the 11" x 7" lining and outer fabric right sides together with the top edges aligned properly. Sandwich the zipper along the top edges. Place the tail of the zipper about 1mm or 2mm inwards from the vertical seam line so you won't sew through the tail when you join the body pieces together in the next step and the tail can stay neater once you turn it out. And you will find that it is placed slightly away from the top edges of the fabric, I do so because I want the seam line to be sat on a distance of 1/5inch (5mm) away from the zipper teeth and I can easily stitch the zipper on by following the seam line.


Once you have pinned the pieces properly, change the presser foot to the zipper foot if you are using the sewing machine. Sewing from the tail of the zipper by following the seam line. Keep sewing all the way down the zipper until you are about one inch from the end (or about 1/2 inch from the seam line). Keep your needle down in the fabric and then lift the zipper foot. Now, unzip the zipper until the pull tab moved to the behind of the foot. Pull the zipper tape where the needle still down towards the seam allowance and continue your sewing to the end. Trim off the excess zipper tape. Flip the two pieces of fabrics wrong sides together and topstitch the fabric edge on the zipper. Repeat the steps to finish the opposite part.


Once you have finished sewing the two parts, it will look like this.


Sew a strip with the 2" x 9" fabric. Unzip the zipper to the halfway. Place all the matching pieces right sides together.  Fold the strip in half to create a handle for the pouch. Then, insert the handle between the outer fabric pieces where it is near to the zipper tail. Pin properly. Sew all the way around the fabric, leaving an opening at the bottom of the lining for turning.


Now, it is time to create a box bottom for the pouch. Squish the purse corner so the side seam lay directly over the bottom seam. Sew a 1" straight line across the corner and trim the excess fabric at the corner. Do the same for the other corners. Now, turn the pouch right side out and close the opening with slip-stitch. Done.


Look at the inner bag, the seams are invisible.


The outer pouch looks like this.


Sunday, 7 April 2019

How to Make a Fabric Key Cover

What should you do if the keys wandering in your bag and scratch the bag lining or tangle up with those loose corded items especially the headphone wire? A key cover might help you up. It is also a good choice to sew a key cover as a gift to your friends or family members in any occasion. A fancy handmade fabric key cover always useful and to be very intimate.


Materials: 
1. Cotton fabrics
2. Batting
3. Lace
4. Drawstring
5. Key ring
6. Vinyl (optional)
7. "Handmade" label (optional)


Instructions


Prepare a paper pattern as shown in the photo.


Place the paper pattern on the batting, cut out 2 arch-shaped batting pieces without adding any seam allowance.


By using the same paper pattern, cut out all the necessary fabric pieces as shown in the photo. First of all, cut out 2 arch-shaped fabric pieces with the whole paper pattern (remember to add 1cm seam allowance to all the fabric pieces). Then, cut out the rectangle from the paper pattern and now you have 2 parts of paper patterns. Cut out 2 small arch-shaped fabric pieces and 2 rectangle pieces with the 2 paper patterns respectively.


Apply heat transfer vinyl on the right side of a small arch-shaped fabric piece. This step is optional. You can sew a button flower, a big bow or an applique pattern on it instead of vinyl.


After that, sew the rectangle fabric piece and the small arch-shaped piece together. Then, sew the lace on the horizontal seam line. Do the same for the other rectangle and the small arch-shaped fabric pieces. If you have the "Handmade" label in hand, sew it on this fabric piece as shown in the photo. 


Attach the batting pieces on the wrong side of the 2 bigger arch-shaped fabric pieces respectively. Sew 2 straight lines to make the batting stays in place.


Now, place the piece with batting and the piece without batting right sides together. Then, fold a seam at the bottom by following the straight seam line. Sew along the arch-shaped and leave the bottom unsewn. Once finished, turn the piece right side out and close the opening(bottom) by top stitching a straight line along the edge.


Now, you have 2 beautiful front and back pieces. It is nearly to complete a key cover. Let's go to the next steps.


Tie the key ring with the drawstring and make a fabric flower bud at the end of the string. Sandwich it between the two beautiful pieces that placed wrong sides together. Pin it properly. Slip stitch along the arch to combine the two beautiful pieces and leave the bottom unsewn. Remember to leave a small opening for the drawstring on top of the arch.


Slip stitch/blind stitch along the arch.


A key cover is born!


Wednesday, 27 June 2018

How to Sew a zippered Pillowcase

There are a few ways to sew a zippered pillowcase. You can sew a pillowcase just with a single piece of fabric or more pieces of different kinds of fabrics, and you can also sew a hidden zipper or an exposed zipper for it depending on your desired design. Today, I am going to use a single piece of fabric and a nylon coil zipper to sew an exposed zipper pillowcase. The pillowcase is sewn to fit the pillow size 16" x 16".


Materials:
1. A piece of 33" x 17.5" fabric (included seam allowances)
2. A piece of 18" nylon coil zipper


Instruction


The fabric included 3/4" seam allowance for the long edges and 1/2" for the short edges. To prevent the raw edges from unraveling, we should double fold the raw edges. First of all, place the fabric wrong side up and double fold the short edge (fold the raw edge to the blue seam line and then make the second fold from the seam line). Then sew a straight line along the inner folded edge as shown in the picture. Repeat the same to the other short edge.


Next, double fold the long edge. This step is slightly different with the above step. Fold the raw edge to the halfway of the seam allowance and then make the second fold to the seam line. Sew the hem. Stitch close to the inner folded edge. Repeat the same for the other long edge.


Once you have finished sewing the double folded hem, sew the short edges on either side of the zipper teeth (working from the right side of the fabric and zippper). Then, trim away the excess zipper.


Unzip the zipper about 2" away and turn the fabric right side together. Make sure the zipper is placed at one side and the zipper will be folded in half as shown in the picture. Sew a straight line along the inner folded edge. After that, sew the opposite edge with the same method.


Turn the pillowcase right side out and push the corners out. You are done!! You can try to sew your desired pillowcase in other size but this method is not recommanded to sew a pillowcase that the size is smaller than 13" x 13" as it is not easy to install the zipper on a single piece of fabric for a beginner.


Saturday, 7 April 2018

How to Make a Necklace with Extender Chain

Bronze plated beads and charms are great to use as ancient goodies in jewellery making. I am going to use bronze plated alloy beads, charms and findings for my necklace making project this time. Apart from the unique appearance, this necklace features a built-in extender chain that will allow you to adjust the necklace length easily. So, no need worry about the size.


Materials:
1. 2mm black Korea Waxed Cords (36cm)
2. Bronze plated pendant (1pc)
3. Bronze plated mini charm (1pc)
4. Bronze plated leather crimps (2pcs)
5. Large hole bronze plated tube beads (2pcs)
6. Lobster clasp (1pc)
7. Jump rings (2pcs)
8. Raw bronze plated chain (8cm)
9. Bronze plated bail 


The materials that showed in the photo are the beads, charms, findings and cords that we have to prepare for this project.


 Instruction


First of all, get ready a pendant with tube bail and an extender chain. So, join the pendant and the mini charm to the tube bail and the 8cm raw chain respectively. You can use a jump ring to join each set of components together. Anyway, I prefer to hang the mini charm to the twisted link than using a round jump ring. It might be a bit tricky to open and close the closure of a twisted link especially when you want to close the link back to its original shape. Don't worry, you can use two pairs of chain nose pliers to fix it. I believe you can get the extender chain done.


Then, string the tube beads and charm onto the 36cm Korea waxed cord as shown in the photo.


Now, align the cord ends nicely and place the ends into the leather crimp as shown in the first photo. Use pliers to fold down one side of the crimp over the ends, then the other side. Repeat the same step at the other end of the cords.


Then, join the lobster clip to one end of the finished cord with a jump ring.


After that, join the extender chain to the other end of the finished cord. I don't use any jump ring to join the components together. As what I have done at the first step, separate the link at the other end of the extender chain and hang it onto the little loop of the leather crimp. Close the closure and done.


My new ancient bronze necklace is done.


Wednesday, 21 March 2018

How to Make a Bead Charm


I like bead charms with flower bead caps because they give my designs a professional touch. Today, I am going to share with you how I make a bead charm with flower bead caps. In this project, I am going to use two pieces of flower bead caps in different sizes. The small one will be layered onto the bottom and the big one will be layered onto the top of the bead.


Tools and Materials
1. Chain nose pliers
2. Round nose pliers
3. Wire cutter
4. Bronze flower bead caps in different sizes
5. Bronze headpin
6. Round bead (10mm)


The above photo shows the materials and tools for making a bead charm. We use round nose pliers for wire wrapping and forming loops. One side of the nose is tapered round and the other side is a slight concave shape that bends your wire in a curve shape. The wire cutter is to be used to cut the excess wire, whereas we use the chain nose pliers for holding small items and shaping wire. The small bead cap will be put at the bottom of the bead and the big bead cap will be put at the top of the bead. The headpin features a flat head on one end that acts as a stopper, ensuring the bead is secured onto the wire.

Now, let's turn your favourite bead into a beautiful bead charm just in a few steps.


Instruction


Thread the headpin through the small bead cap, bead and then big bead cap one after another as shown in the photo. Ensure the correct order is followed.


Using chain nose pliers, bend the wire to the side of the bead to form a right angle (90 degrees).


Using wire cutter, cut the wire about 10mm away from the bead.


Then, use the round nose pliers to grip the end of the wire and press the end tighly as shown in the photo.


Now, roll the pliers towards the bead. Usually, I have to roll the pliers twice to make a full loop. If  the loop is not at the center of the bead, you can use the chain nose pliers to center it


A bead charm is done and ready to attach to your bracelet, necklace or more.


Related Posts Plugin for WordPress, Blogger...